Example to create a new class of infrastructure. In this example, an intelligent smart charger for electric cars for a fictitious tech company.
- Go to your ServiceNow developer instance.
Go to the “CI Class Manager” page.
- Select [All]
- In the search box type “ci class“
- Then click on “CI Class Manager“
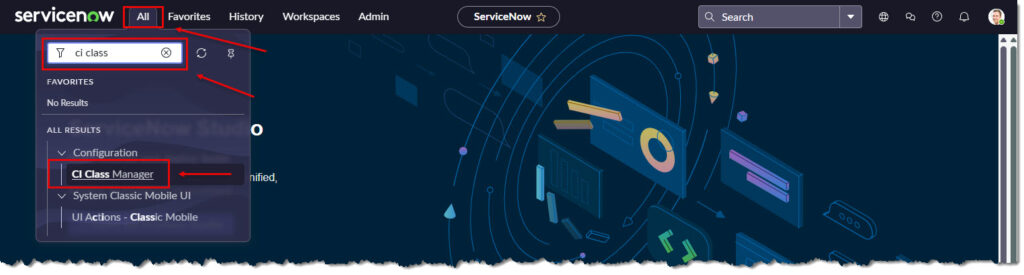
- The “CI Class Manager” page will appear.
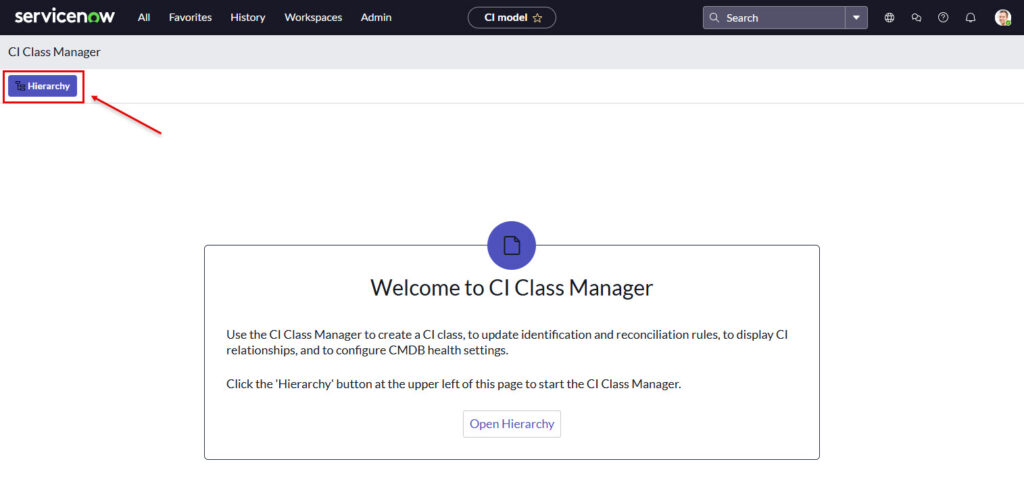
- The CI Class Manager is a centralised interface for managing all CMDB tables and class hierarchy.
- Click on [Hierarchy]. This will show all the different forms of classes.
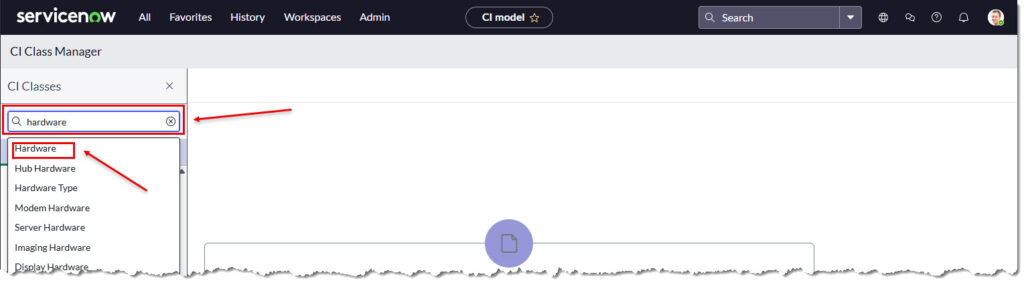
- For our example we want to use the “Hardware” class
- The full hierarchy of class types will be shown.
- In the search box type “hardware” and press [Enter].
- Click [Hardware].
- The “Hardware > Basic Info” pages shows all the attributes of the “Hardware” class.
- Click on [Add Child Class] to continue.

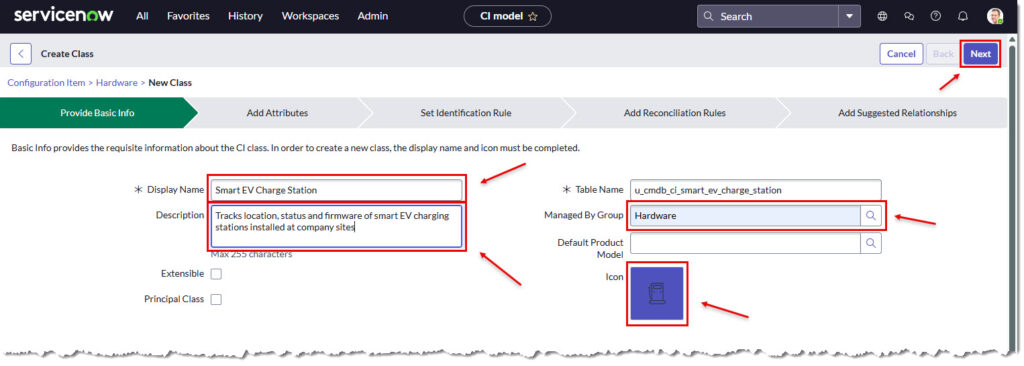
- The “Create Class” page will appear in the “Provide Basic Info” Tab.
- Now we can enter data in the blank fields.
- In the “Display Name” field, enter “Smart EV Charge Station“
- In the “Description” field, enter “Tracks location, status and firmware of smart EV charging stations installed at company sites“
- In “Managed By Group” field, search for, and select “Hardware“
- Click in the “Icon” field and locate the “Fuel” icon.
- Leave “Extensible” unchecked. This allows this class to have child classes beneath it
- Leave “Principal Class” unchecked. ” This defines the base behaviour, attributes, and relationships your new class will get automatically
- Click “Next” to continue.
- The “Add Attributes” page will appear.
- Start by double clicking in the “Column Field” and enter the new attributes names needed for our EV charger. Click the Tick symbol to complete
- Modify the Type columns from String to Decimal when required,
- Set “Identification Rule” to true to prevent duplicate entries. For example, “Serial Number” should have no duplicates. New CI’s created under this class will force unique serial number.
- Click [Next] to continue.

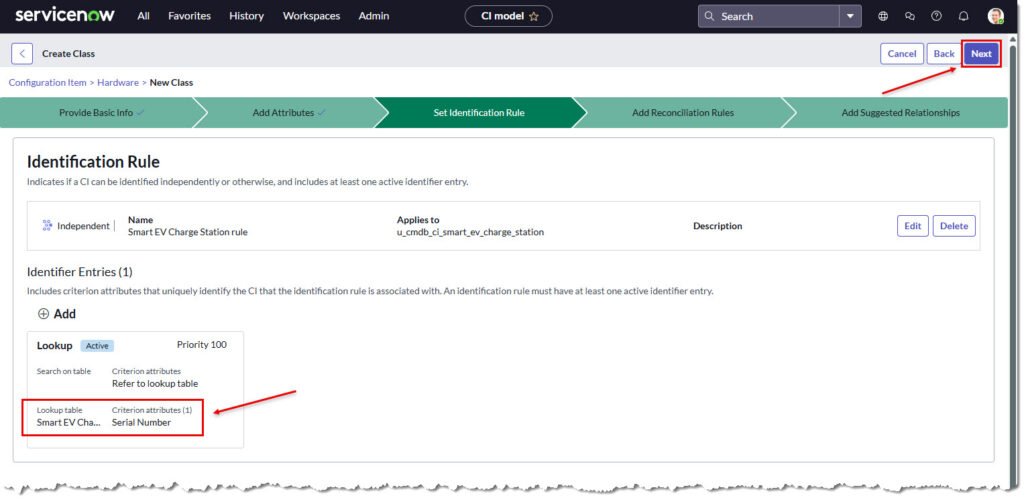
- The “Set Identification Rule” page will appear.
- This page specifies how ServiceNow will uniquely identify CI’s created in this class.
- A default entry was automatically created using the “Serial Number” as the unique identifier.
- Click [Next] to continue
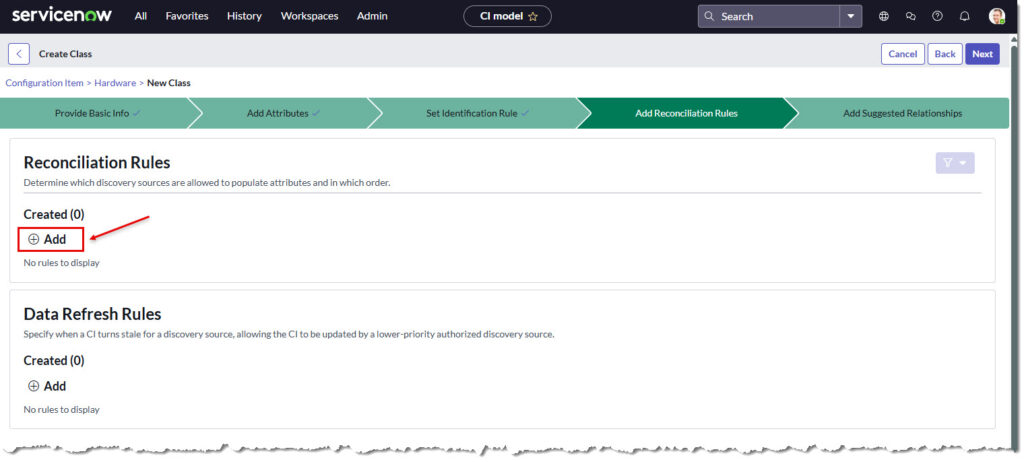
- The “Reconciliation Rules” page will appear. This tell ServiceNow which sources of Discovery can populate the CMDB and what are the priorities of these sources.
- Click [Add] to create a rule.
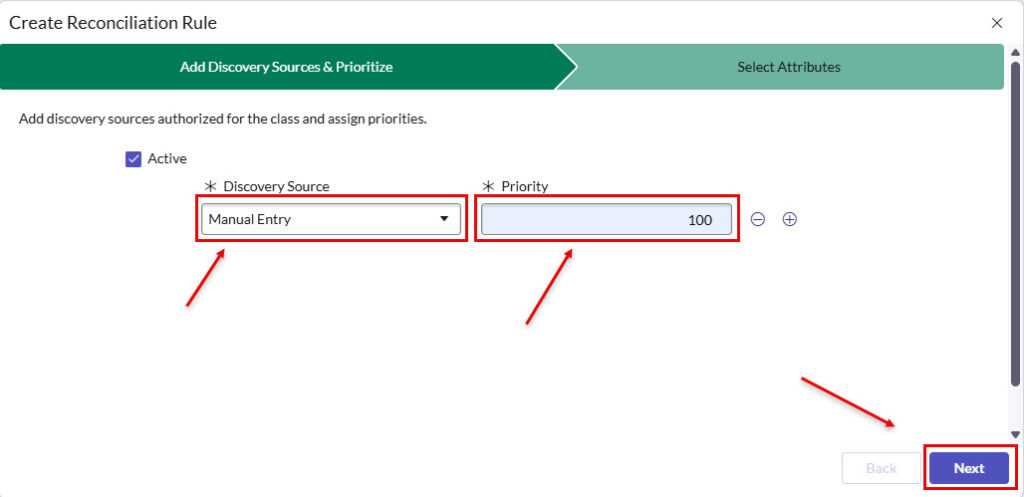
- The “Create Reconciliation Rule” (Add Discovery Sources & Prioritise) Page will appear.
- Use the pull downs from “*Discovery Source” and select “Manual Entry“
- Set “* Priority” to [100] and click [Next]
- Click “Add” again and include the following:
- “OpenView” = “200“
- “Alteris” = “300“
- Then click [Next]
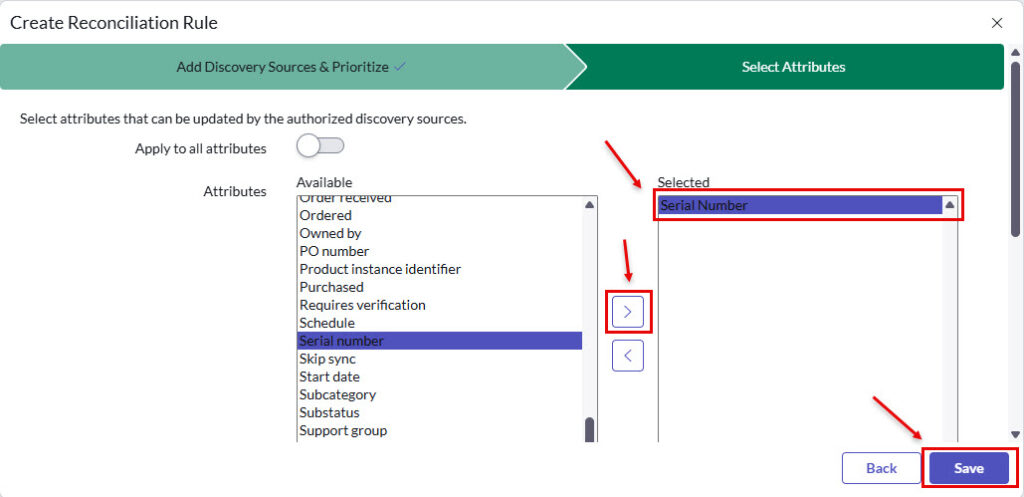
- The “Create Reconciliation Rule” (Select Attributes)
- Move “Serial Number” from the “Available” Column to the “Selected” Column
- Click [Save] to continue
- The “Reconciliation Rules” page will return
- Add a new Data Refresh Rule by clicking [Add]
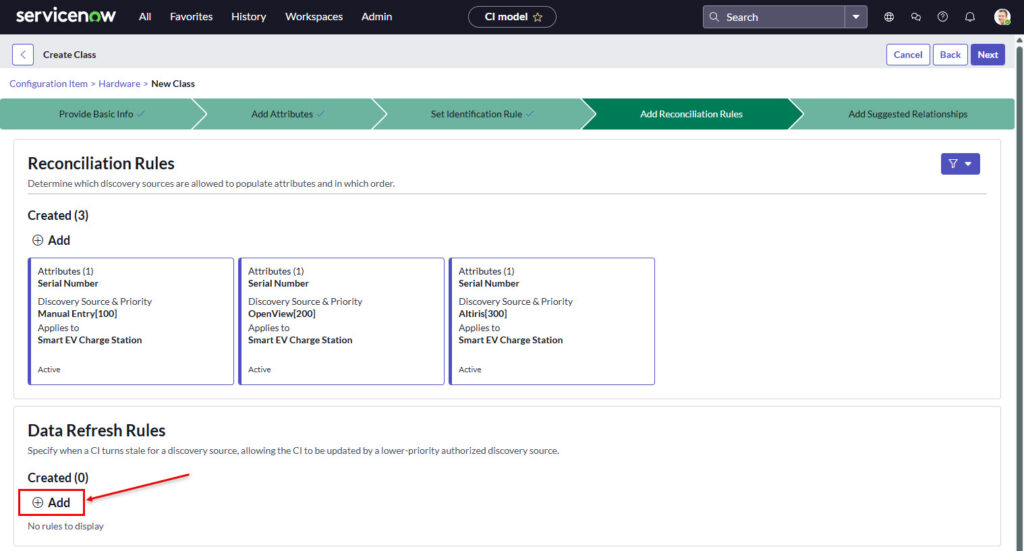
- The “Create Data Refresh Rules” dialog box will appear.
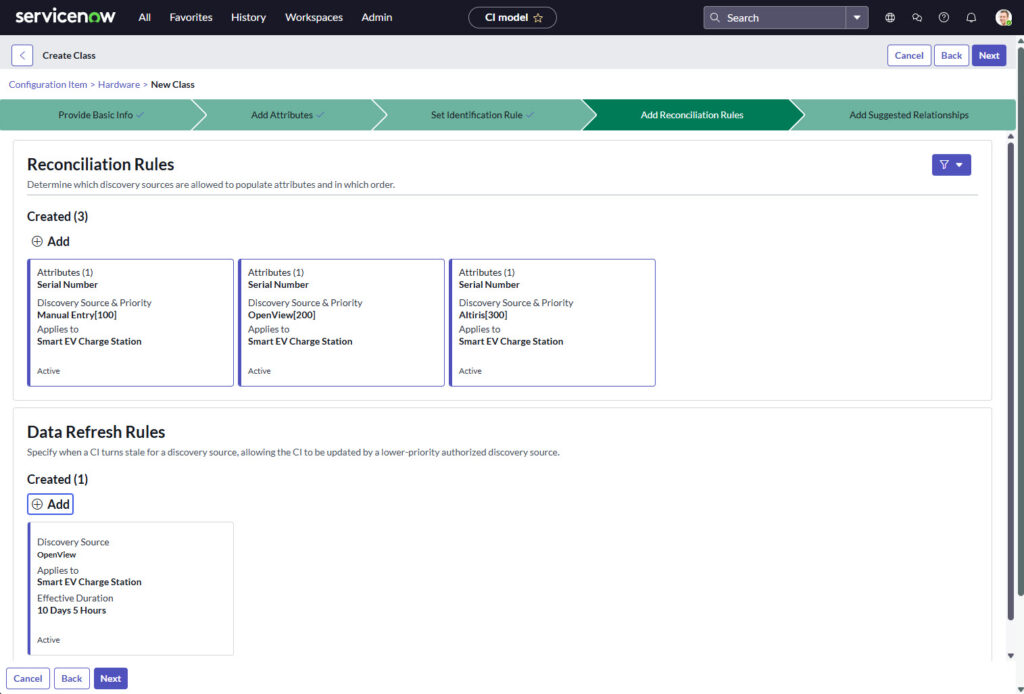
- Select the [Discovery Source] and set to “OpenView“
- Select the [Effective Duration] and set to “10” days, “5” hours
- Select the [Active] tick
- Then click [Save]

- The previous screen will appear with the “Data Refresh Rules” populated with the discovery source populated.
- Click [Next] to continue
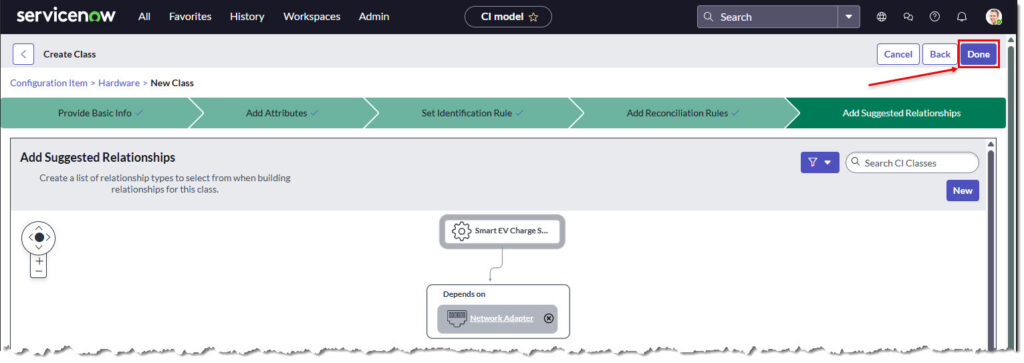
- The final step is the “Add Suggested Relationships” tab
- Click [New] to continue.
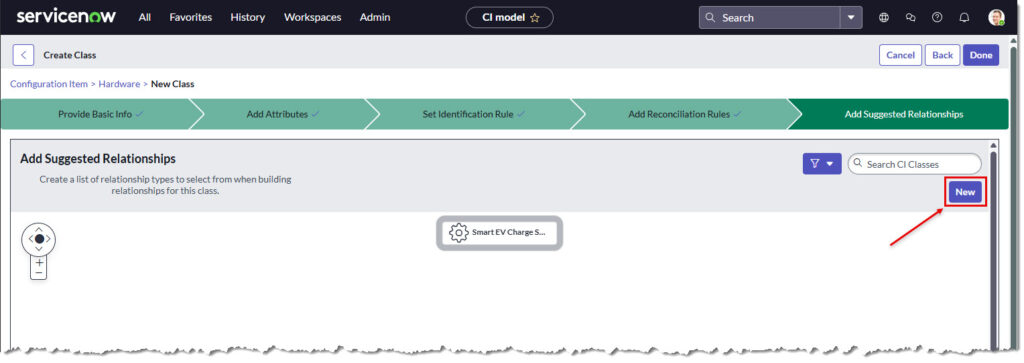
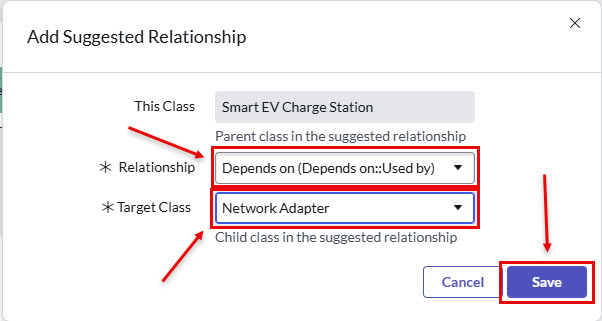
- The “Add Suggested Relationship” dialog box will appear
- Populate the [Smart EV Charge Station].
- Set “Relationship” to “Depends on“
- Set “Target Class” to “Network Adapter“
- Click [Save] to continue
- A visual diagram of the relationship is shown. New / additional relationships can be added by clicking [New] again.
- Click [Done] to continue.
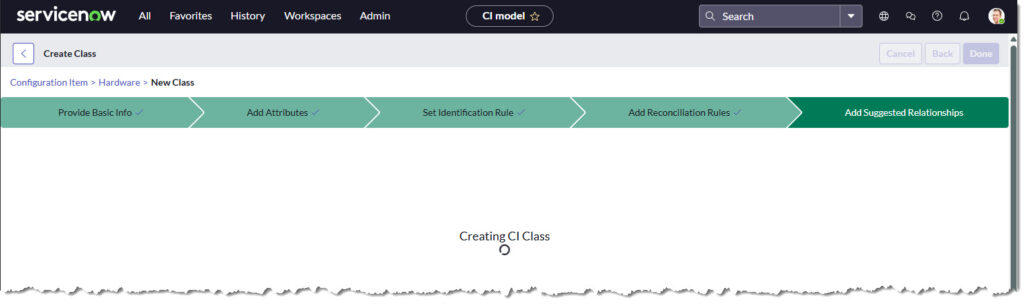
- The process of creating a new class may take 30 seconds to process
- You’ll see a screen similar to below
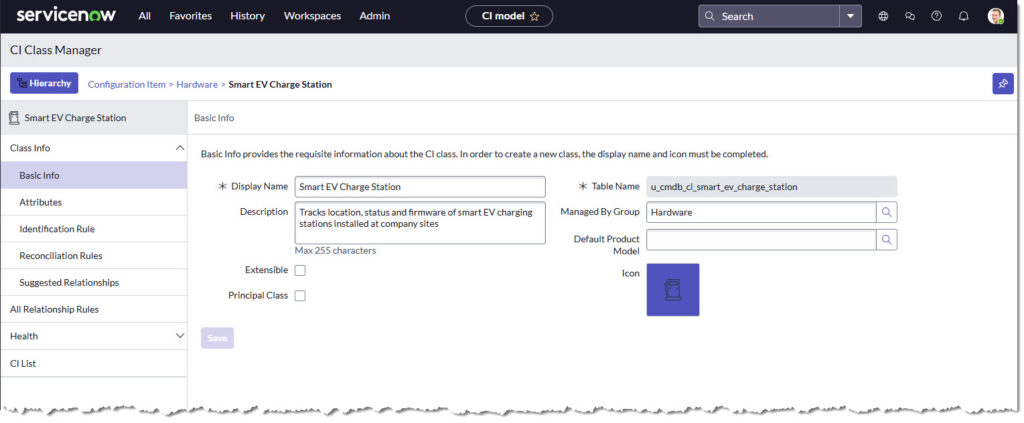
- The new CI is now created
- To view the in the ServiceNow table navigator
- Copy the table name from the “Table Name” field.
- In this example “
u_cmdb_ci_smart_ev_charge_station“ - Select [All] from the top menu and paste “
table_name.list” into the navigator. e.g: “u_cmdb_ci_smart_ev_charge_station.list“ - Hit [Enter] in the navigator to continue
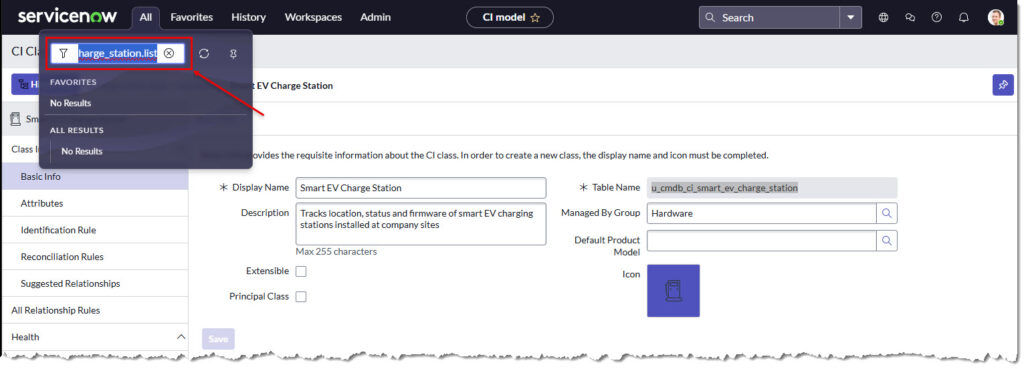
The “Smart EV Charge Stations” table page will a appear.
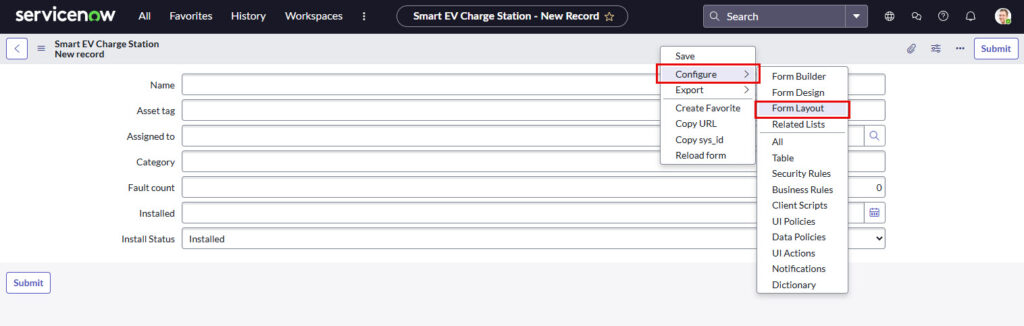
Click [New] to create CI record for this class.

- New CI can be created in this page but only the default fields are presented.
- Add new fields to the page by righ clicking in the grey tool bar.
- Select [Explore] and [Form Layout]
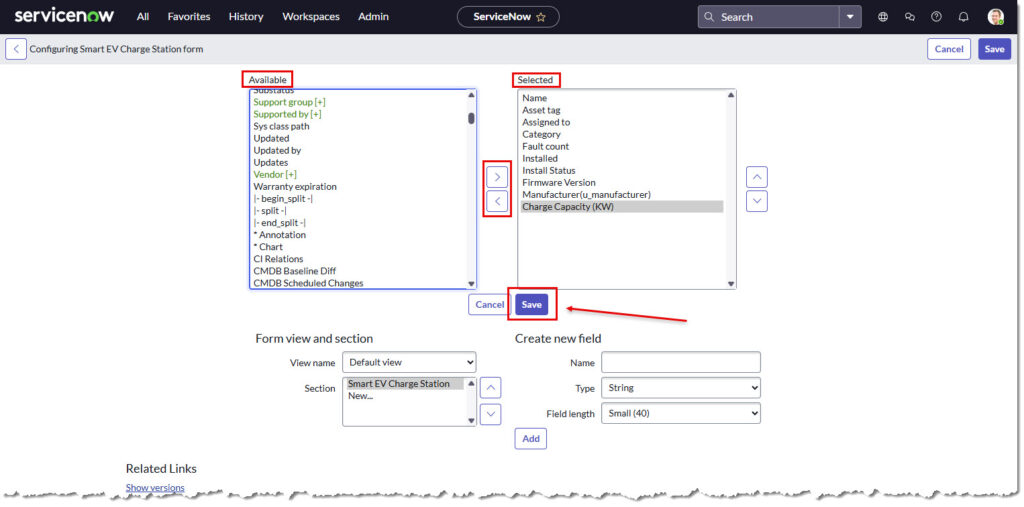
- Move required fields from Available to Selected by highlighting and click [Save]
- In this example I’ve added:
- Firmware Version
- Maunufacturer
- Charge Capacity (KW)
- The new form will appear with the new fields.
- Enter data into the required fields and click [Submit]
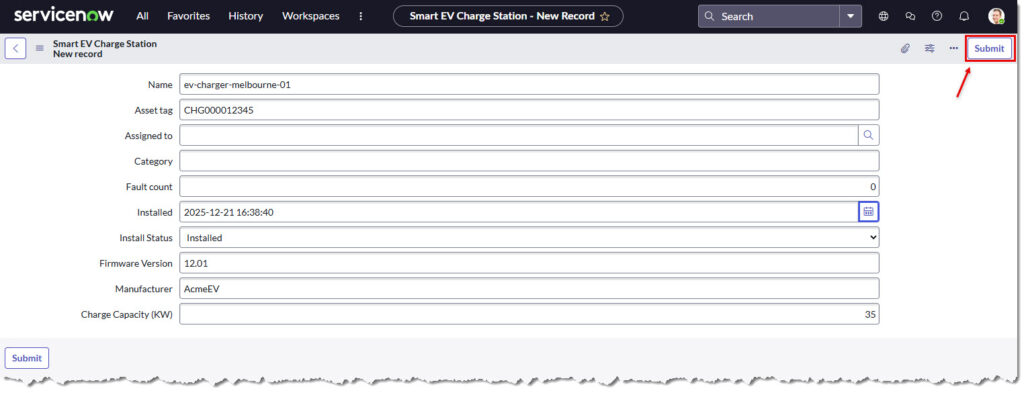
- The new record can be seen here

EOF